Capstone Project
Computational Binder Design
Live Workshop Sessions
Two companion recordings to watch before starting your capstone: a broad overview of the cutting-edge ML tooling landscape, and a practical walkthrough of a complete design workflow.
Overview
Binder design is often formulated as “given a target protein (and optionally a specific epitope on that protein), design a (often smaller) protein capable of binding the target”. It is one of the most ubiquitous protein design problems and has many potential applications, largely functioning by blocking or competing with natural interactions involving the target protein.
In this bootcamp, you’ll have the opportunity to explore the computational binder design problem across three different categories of targets. Students will choose from a curated list of targets that have been validated with BindCraft and other computational binder design tools.
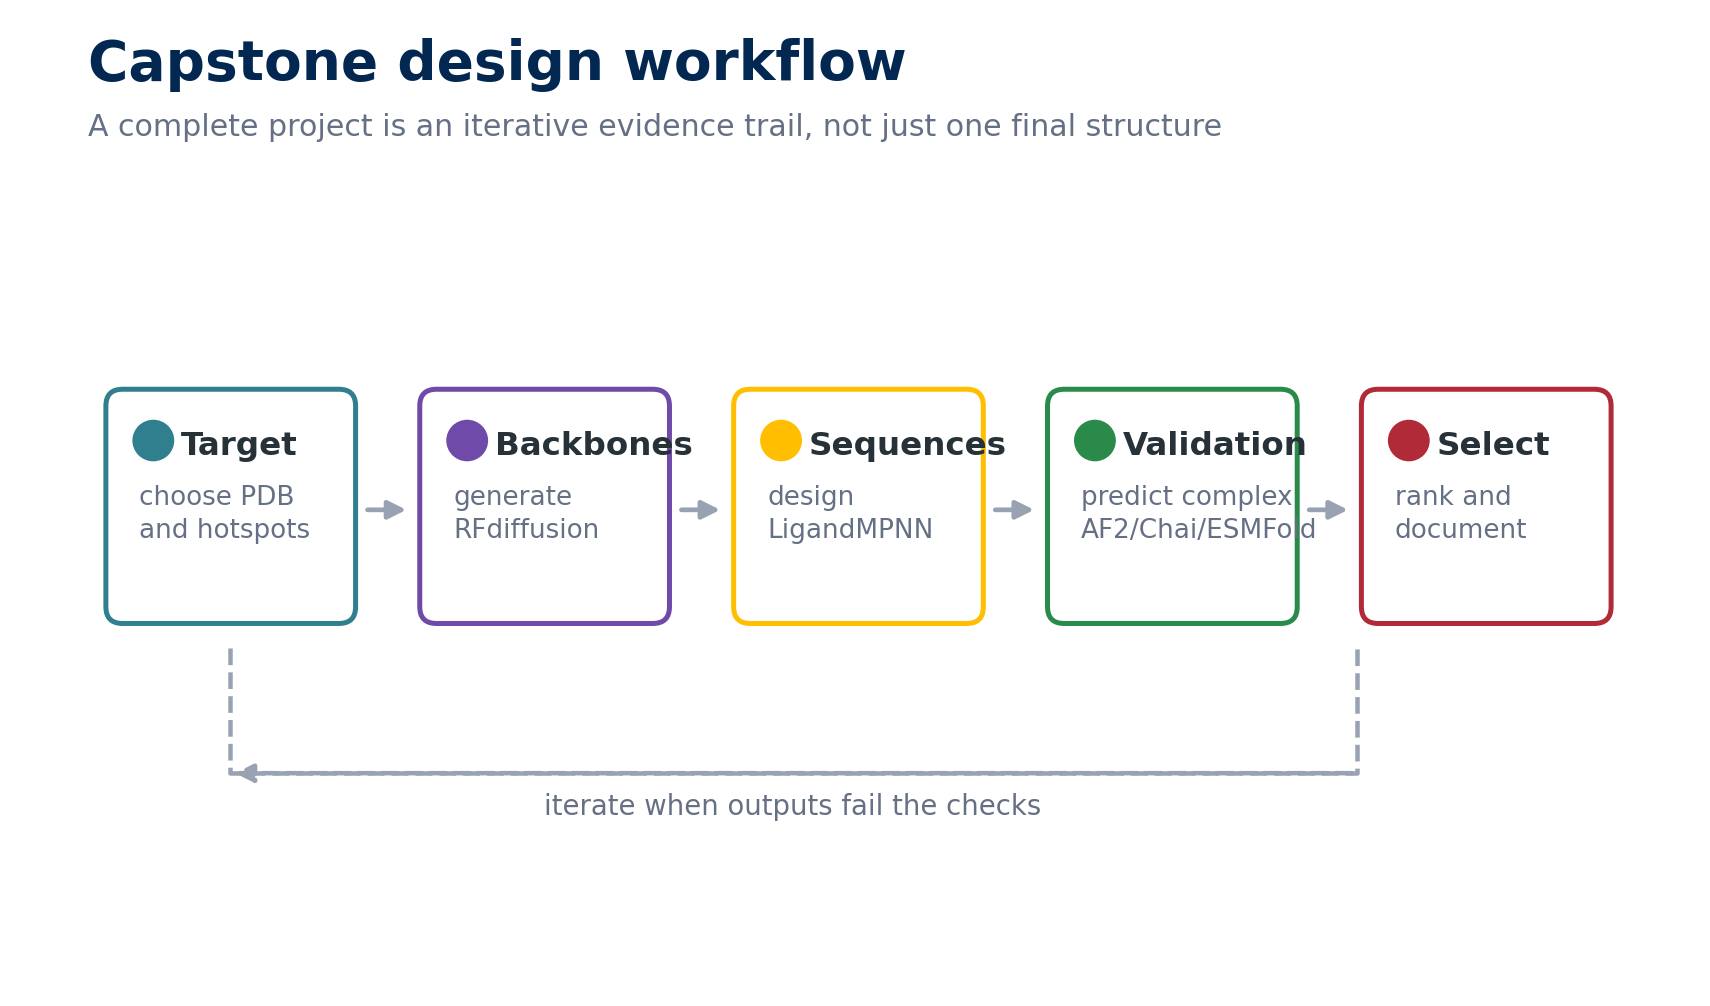
Treat the capstone as an iterative evidence trail. Each pass should record the target, settings, outputs, validation result, and reason for keeping or discarding a design.
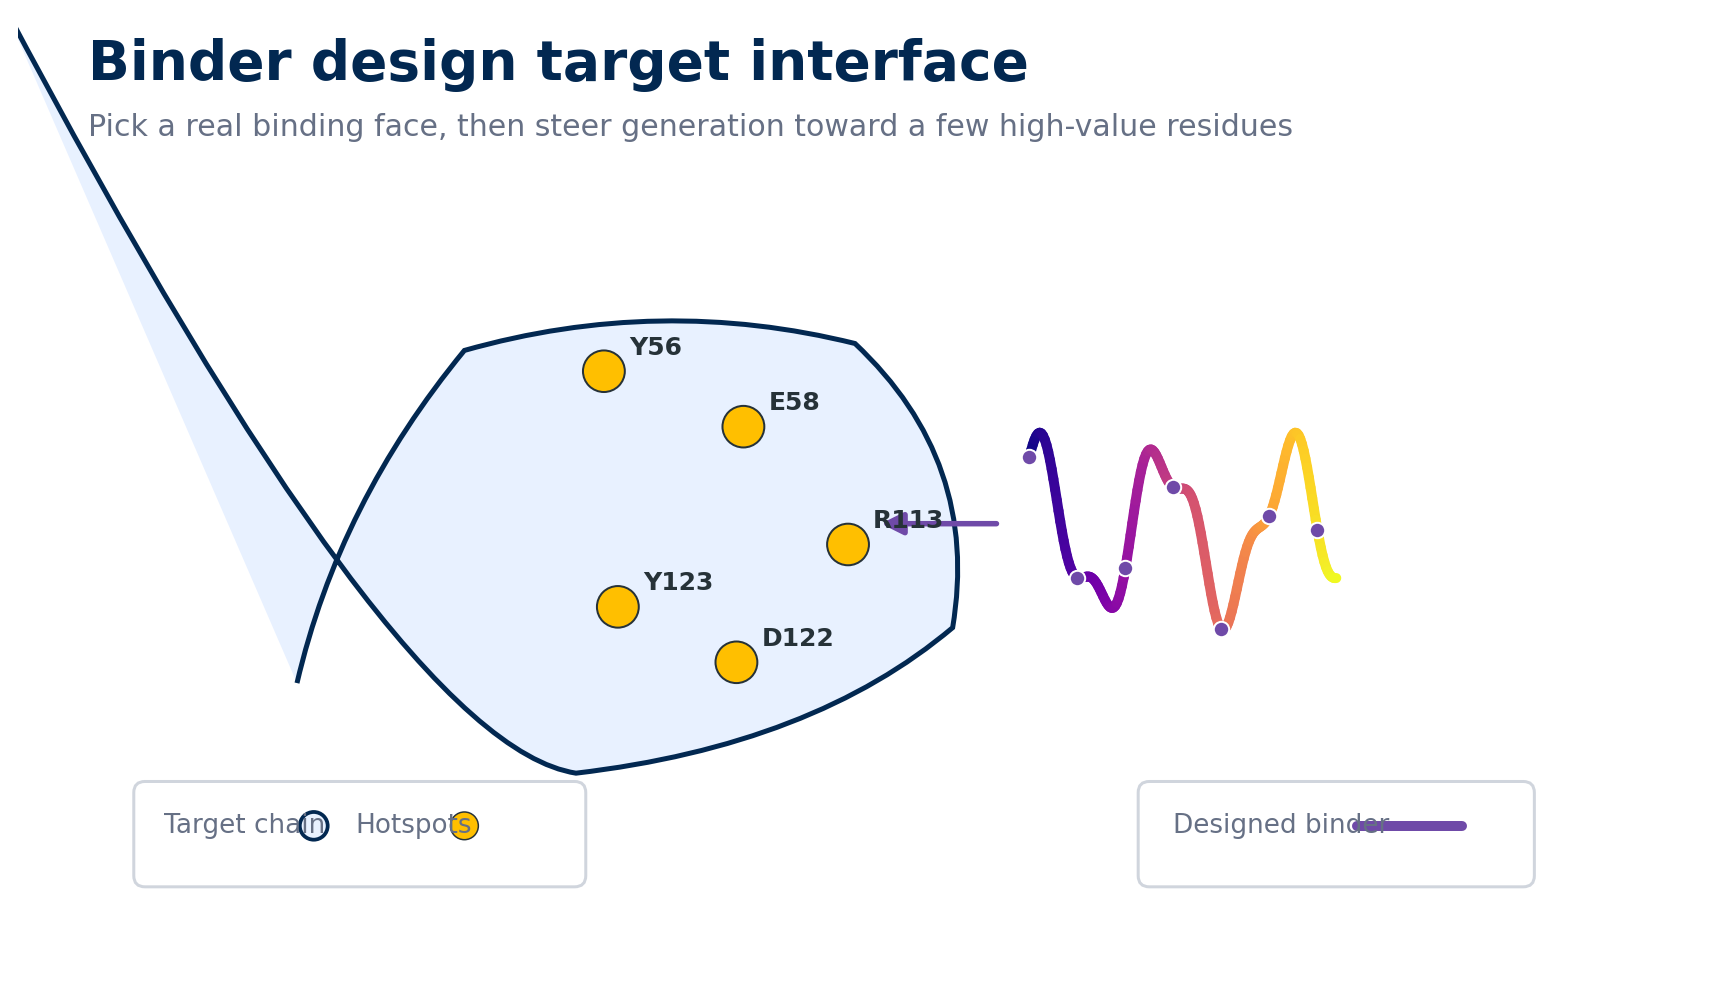
Start from a real binding face. A small set of high-value hotspot residues gives RFdiffusion or BindCraft a much clearer target than an unrestricted protein surface.
Target Categories and Options
Immune Checkpoint / Receptor Targets
| Target | UniProt | Description |
|---|---|---|
| PD-L1 | Q9NZQ7 | Immune Checkpoint |
| IFNAR2 | P48551 | Interferon receptor |
| IL-7Rα | P16871 | Interleukin receptor |
Antibody-like Targets
| Target | UniProt | Description |
|---|---|---|
| Bet v 1 | P15494 | Birch pollen allergen |
Enzyme / Small Molecule Binders
| Target | PDB | Description |
|---|---|---|
| TrkA receptor | 1WWC | Nerve Growth Factor Receptor |
| TEM-1 Beta-Lactamase | 1FQG | Antibiotic Resistance Enzyme |
| GM2 Activator Protein | 1G13 | Lipid Transport Protein |
| Beta-Glucosidase | 2JIE | Enzymatic Catalyst |
Project Structure
Select a target from the list above and work through the binder design process. As you learn about each tool in the preceding lessons, explore how that tool works for your particular protein. Be sure to make note of any quirks or nuances related to your protein, e.g. any particular settings used or any issues encountered.
Keep a lab notebook (digital or physical) to document your predictions, results, settings tried, and commands used. This will be invaluable when synthesizing your findings at the end of the project.
Goals
- Gain hands-on experience running DL-based tools on specific proteins
- Troubleshoot and address any issues related to your target protein
- Learn about tips and tricks used to get more favorable outputs
- Gain experience communicating about computational tools and settings
- Gain experience interpreting results and exploring various settings
Synthesizing Your Work
A key part of learning is synthesizing and communicating what you’ve done. In the live workshop, students gave 20-minute group presentations. For self-paced learners, consider one of these formats to consolidate your learning:
- Written report summarizing your process and findings
- Video walkthrough explaining your approach and results
- Jupyter notebook with narrative text alongside code and figures
- GitHub repository with a comprehensive README documenting your project
Even if you’re not presenting to anyone, creating slides is a great way to learn! The process of organizing your work into a clear narrative helps solidify your understanding.
However you choose to document your work, aim to cover the following:
- Background and introduction to target protein
- Structure prediction results
- Backbone generation results
- Sequence design results
- Design rationale - explain the specific choices, settings, and approaches used and why
I find the design rationale section to be the most helpful to my learning and understanding.
- Results from miscellaneous tools
- Summary and takeaways